The Intersection of Technology and Botany: Creating an Orchidarium with IO Controllers
Automation has revolutionized the way we interact with our environments, making complex tasks easier and more efficient. Whether it’s home automation, industrial systems, or personal projects, technology is empowering creators to dream big and achieve precise control over their setups. One of the key players in this transformation is the IO controller, a versatile device that serves as the brain behind countless automation systems. Paired with components like smart relays and 8-channel relay boards, these controllers open up endless possibilities for managing devices and systems.
For hobbyists and plant enthusiasts, one fascinating application of these technologies is the creation of a DIY orchidarium—a custom enclosure designed to nurture orchids in a controlled environment. In this article, we’ll explore how IO controllers form the backbone of automation projects, delve into the functionality of smart relays and relay boards, and provide a detailed guide to integrating these components into your orchidarium. By the end, you’ll not only understand the role of these technologies but also feel inspired to bring your own automated projects to life.
Understanding IO Controllers
At the heart of any modern automation project lies the IO controller, a device that manages and orchestrates the operation of connected components. Short for “Input/Output controller,” an IO controller serves as the central hub, processing incoming data (input) and triggering actions (output) based on predefined parameters. Its versatility and reliability make it a critical component in applications ranging from industrial machinery to DIY projects like a custom orchidarium.
What is an IO Controller?
An IO controller acts as the intermediary between your sensors and actuators. Sensors gather data—such as temperature, humidity, or light intensity—and send it to the IO controller. Based on this information, the controller activates the appropriate devices, like fans, misting systems, or lights. With a programmable interface, users can define how the controller reacts to different inputs, ensuring precise and automated control.
For instance, in a DIY orchidarium, an IO controller might receive data from a humidity sensor. If the humidity level drops below a set threshold, the controller could activate a misting system to maintain optimal growing conditions. This seamless automation eliminates the need for constant manual adjustments, making it an essential tool for plant care.
Key Features of IO Controllers
Programmability: IO controllers allow for customization, enabling users to tailor their automation processes to specific needs.
Connectivity: Modern IO controllers support a wide range of communication protocols, such as Wi-Fi, Bluetooth, and Ethernet, ensuring they can integrate with other devices.
Reliability: Designed for long-term operation, these controllers are built to handle the demands of continuous monitoring and control.
Scalability: Whether managing a single device or an entire network of sensors and actuators, IO controllers can scale to suit the size of the project.
Why IO Controllers Are Central to Automation
Unlike standalone smart devices, an IO controller serves as the nerve center for a cohesive automation setup. Its ability to process multiple inputs and manage outputs simultaneously allows it to oversee complex systems. For an orchidarium, this means coordinating devices like heaters, fans, lighting, and pumps—all while responding to real-time environmental changes.

Real-World Applications in an Orchidarium
Imagine you want to maintain the perfect conditions for your orchids. You could set up the IO controller to:
- Monitor temperature and activate a heater if the enclosure becomes too cold.
- Use a light sensor to adjust LED grow lights, ensuring plants receive sufficient light during cloudy days.
- Control a fan system to maintain air circulation, preventing mold and ensuring healthy growth.
With an IO controller at the core of the system, these tasks become effortless and precise, allowing you to focus on enjoying your plants instead of managing their environment manually.
In summary, the IO controller is more than just a piece of hardware—it’s the intelligent backbone of any automation project. From controlling individual devices to overseeing an entire network, its versatility and power make it indispensable, especially for enthusiasts looking to bring advanced technology into their personal projects like a DIY orchidarium.
The Role of Smart Relays in Automation
As we continue exploring the components that bring automation to life, one essential piece of the puzzle is the smart relay. These devices provide an intelligent way to control high-voltage or high-current appliances within an automation system. Unlike traditional mechanical relays, smart relays are equipped with enhanced functionality, allowing for more flexible and precise control over electrical devices in an automated environment.
What is a Smart Relay?
A smart relay is an upgraded version of the traditional relay, which is a simple electrical switch used to control circuits. While a basic relay merely opens and closes contacts to control electrical devices, a smart relay adds the ability to be controlled remotely, programmatically, or through sophisticated logic. It is typically connected to an IO controller, allowing it to respond to input from sensors or external commands.
For example, in a DIY orchidarium, a smart relay could control a light or water pump based on environmental conditions detected by sensors. Rather than needing a manual switch, the smart relay will automatically turn the system on or off based on the parameters set by the user, which could include factors such as time of day, humidity levels, or temperature.
How Smart Relays Enhance Automation
Remote Control: Many smart relays can be controlled via mobile apps or web interfaces, making it possible to manage devices from anywhere. This feature is particularly useful in a DIY orchidarium, where maintaining perfect environmental conditions requires constant adjustments. With remote access, you can monitor your orchidarium’s temperature, humidity, and lighting, and make necessary adjustments no matter where you are.
Scheduling and Timers: Smart relays can be programmed to operate on a schedule, turning lights or pumps on at specific times of day. In an orchidarium, this could mean ensuring that your plants receive light at the right time of day or activating a misting system early in the morning when humidity levels tend to drop.
Energy Efficiency: By automatically controlling when devices are on or off, smart relays can help save energy. For example, you can program a smart relay to turn off a fan when the temperature in the orchidarium is at the desired level, preventing unnecessary power usage.
Integration with Other Systems: Smart relays are highly compatible with other automation systems, such as IO controllers. For example, if the temperature sensor in the orchidarium detects that the environment is getting too hot, the IO controller could trigger a smart relay to activate a cooling fan.

Smart Relay in a DIY Orchidarium Setup
In a DIY orchidarium, the smart relay acts as a bridge between the environmental conditions monitored by sensors and the equipment that adjusts those conditions. Here’s how you might use smart relays in your project:
- Lights: Orchids need a specific amount of light, and a smart relay can control the lights in your orchidarium to turn on at sunrise and off at sunset. If the light levels in the room are low, the relay could be triggered to turn on supplemental grow lights.
- Watering Systems: Many orchid enthusiasts use automated watering systems to ensure their plants receive just the right amount of moisture. A smart relay could control a water pump, turning it on only when the humidity levels in the orchidarium fall below a set point.
- Temperature Regulation: With the help of a smart relay, you can control heating or cooling devices based on temperature readings. If the environment becomes too cold, the smart relay can turn on a heater. If it gets too warm, the relay might activate a fan or cooling system to stabilize the temperature.
The possibilities are vast when you incorporate smart relays into your orchidarium design, creating an environment that is not only self-regulating but also energy-efficient and precise.
Smart Relays and Automation Integration
Integrating smart relays with other automation components like IO controllers makes your system more sophisticated and responsive. An IO controller can gather data from environmental sensors, process that information, and then use the smart relay to execute an action based on the input. For example, if a humidity sensor detects a drop in moisture, the IO controller could send a command to a smart relay, activating a misting system or watering device.
This communication between the IO controller and smart relays creates an ecosystem of automated processes that can run independently, freeing up the user from constant oversight. With the combined power of IO controllers and smart relays, your orchidarium can function efficiently and automatically, ensuring optimal conditions for your plants at all times.
In summary, smart relays are crucial components in any automation system, providing intelligent, remote, and precise control over high-power devices. In a DIY orchidarium, their ability to control various systems like lighting, watering, and temperature makes them an invaluable tool in creating a self-sustaining environment for your plants. By leveraging the power of smart relays, you can ensure that your orchidarium operates efficiently, while also reducing energy consumption and improving plant care.
Exploring the 8-Channel Relay Board
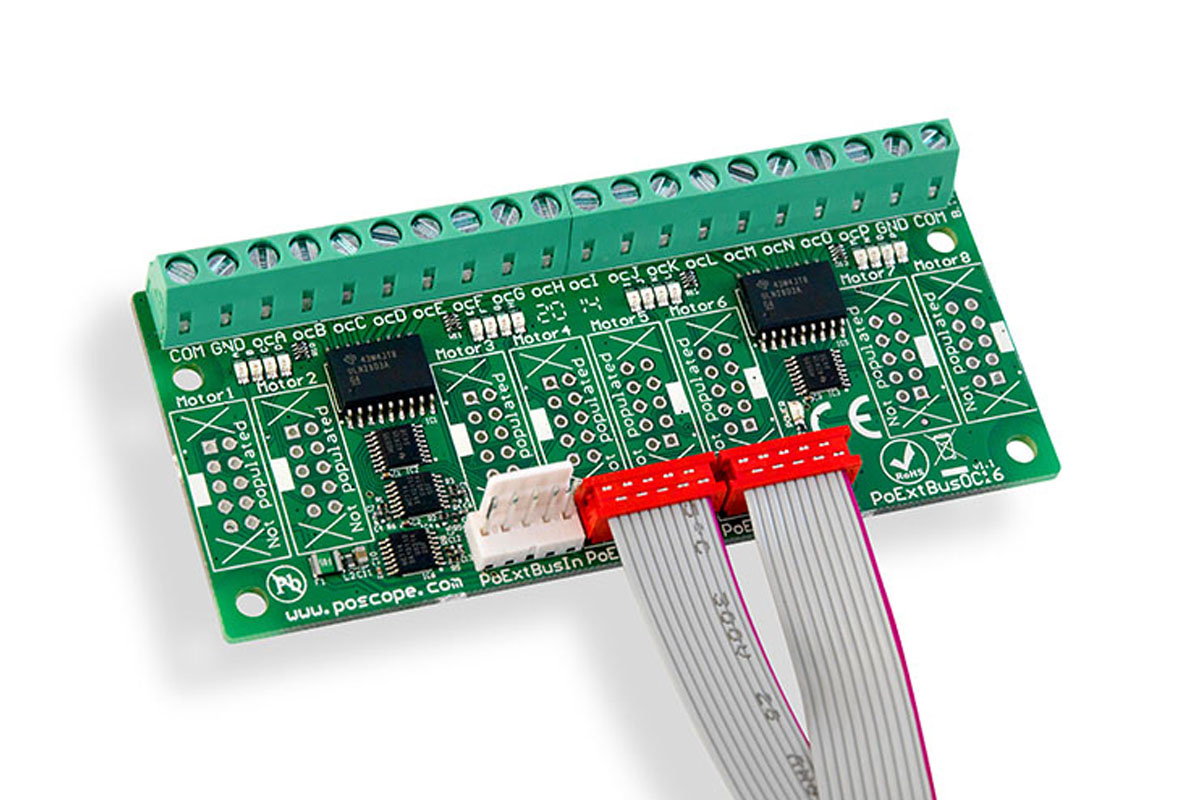
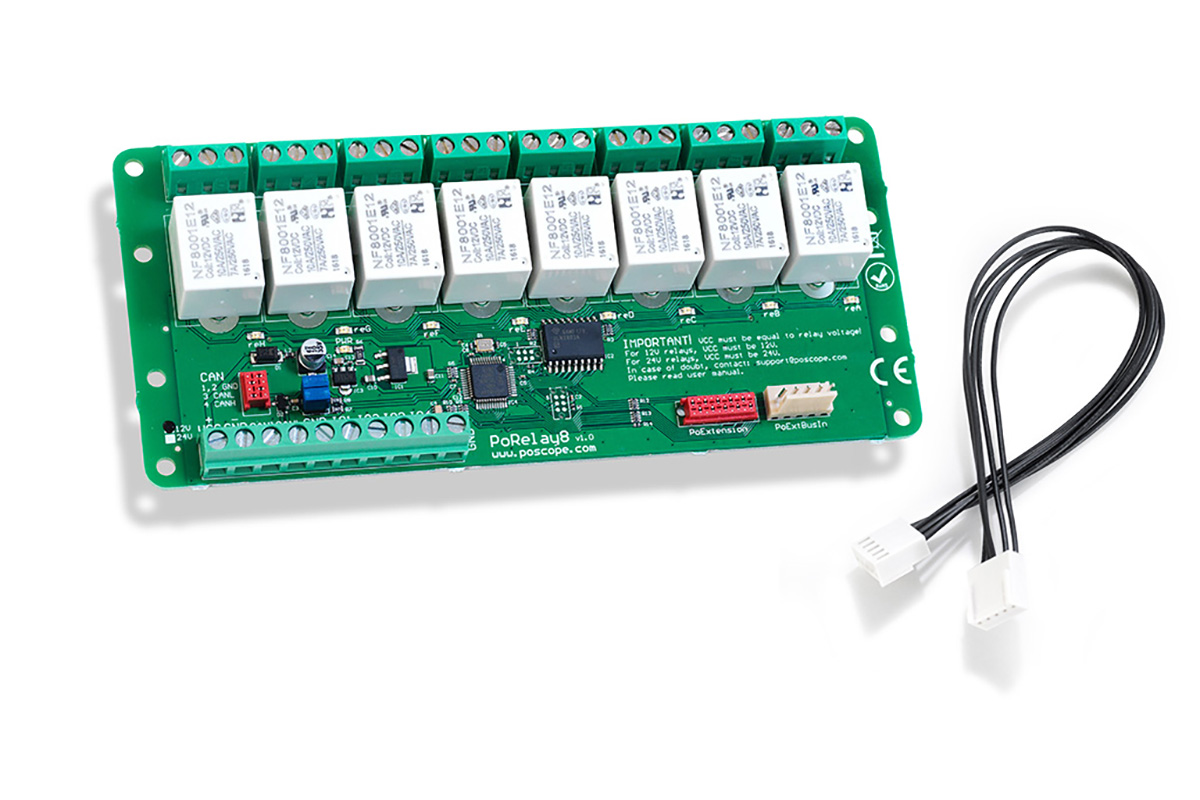
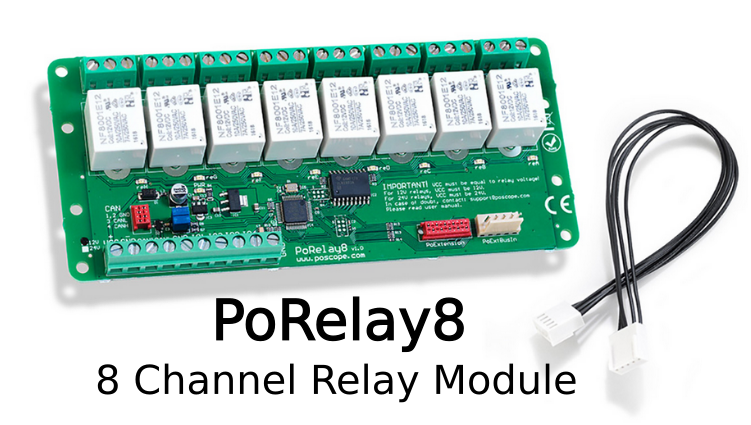
As automation systems become more sophisticated, having the ability to control multiple devices simultaneously is crucial. This is where the 8-channel relay board comes into play. A relay board, in general, is a circuit that allows you to control multiple electrical devices with a single controller, while an 8-channel relay board takes it a step further, providing the capacity to control up to eight separate devices. This capability makes it ideal for managing more complex systems, like a DIY orchidarium, where multiple devices need to work together to maintain an optimal growing environment for plants.
What is an 8-Channel Relay Board?
An 8-channel relay board is a circuit board that houses eight individual relays. Each relay controls a separate device, which can be anything from a light, pump, fan, heater, or any other electrical appliance. The board allows each relay to be individually triggered through a digital signal sent from a controlling device, such as an IO controller. This flexibility is key to automating multiple systems in your orchidarium, all with a single control unit.
For instance, in a DIY orchidarium, you might want to automate the following systems:
- Lighting: Adjust the timing or intensity of lights to mimic the natural day-night cycle.
- Misting System: Turn on a misting pump to maintain humidity levels.
- Heating/Cooling: Regulate temperature by controlling fans or heaters.
- Watering System: Activate a pump to water the orchids at specific intervals.
The 8-channel relay board enables each of these devices to be controlled independently, allowing for a high degree of automation and precision in your orchidarium setup.
How Does the 8-Channel Relay Board Work?
Each relay on the board is connected to a device that requires power. When the relay is triggered, it closes or opens a switch, allowing current to flow to the device, thus turning it on or off. The relays on the board are activated by signals sent from the IO controller, which processes the data from the sensors and makes decisions based on the conditions you set.

Here’s an example of how it works in a DIY orchidarium:
A temperature sensor detects that the environment is getting too cold for your orchids.
The IO controller processes this input and determines that it needs to activate the heater.
The IO controller sends a signal to the relay on the 8-channel relay board that is connected to the heater.
The relay closes the circuit, turning the heater on, and the orchidarium temperature rises to the desired level.
In this example, the 8-channel relay board allows the system to control the heater while simultaneously managing other devices like lights, misting systems, and fans—ensuring that all aspects of the orchidarium are properly automated without needing separate controllers for each.
Why Use an 8-Channel Relay Board?
Efficiency: An 8-channel relay board allows you to control multiple devices with a single controller, streamlining your system and reducing the need for additional hardware.
Cost-Effective: Instead of purchasing multiple relay boards to control different devices, the 8-channel relay board lets you handle all eight devices with one board, making it a more affordable solution for larger automation setups.
Simplicity: Having all relays in one board makes wiring and setup much simpler. You can easily connect multiple devices without having to manage several separate relay modules.
Scalability: If your orchidarium needs expand and you want to control more devices in the future, the 8-channel relay board makes it easier to scale your system. You can simply add more devices to the board or use multiple relay boards if necessary.
Integrating an 8-Channel Relay Board in Your Orchidarium
The 8-channel relay board serves as a central point for managing various electrical devices in your orchidarium. By using it in combination with an IO controller, you can build an efficient, responsive system to take care of your plants automatically. Here’s how you might use the board in practice:
- Lighting Control: Set the system to turn on and off at specific times of day, ensuring your orchids receive the ideal amount of light.
- Temperature Regulation: Use relays to control heating or cooling devices to maintain a steady environment for your orchids.
- Humidity Control: Connect a misting system to one of the relays, allowing it to be triggered based on readings from a humidity sensor.
- Watering System: Use another relay to control a water pump, ensuring your orchids receive water at precise intervals.
Each device in your orchidarium is independently controlled through the 8-channel relay board, which means you can easily adjust settings based on real-time conditions. For example, if the humidity drops unexpectedly, the system will automatically trigger the misting system to restore moisture levels. Similarly, if the temperature goes outside the desired range, the relays can switch on a fan or heater, helping maintain the ideal environment for your orchids.
Benefits in a DIY Orchidarium
The 8-channel relay board helps bring the concept of a smart orchidarium to life. By integrating it with sensors and an IO controller, you can create an environment that is self-sustaining and fully automated.
- Automation: Everything runs on preset schedules and sensor triggers, reducing the need for daily manual intervention.
- Customization: You can set specific thresholds for each device, making the orchidarium adapt to the unique needs of your plants.
- Precision: The system works with incredible accuracy, ensuring that each component functions when it is needed most.
In conclusion, the 8-channel relay board is an invaluable tool for managing multiple systems in a DIY orchidarium. Its ability to control eight devices at once makes it ideal for larger, more complex automation projects. When paired with an IO controller and smart relays, it enables efficient, energy-saving, and precise management of your orchidarium, creating the perfect conditions for your plants to thrive.
Building Your Own DIY Orchidarium
Creating a DIY orchidarium is a rewarding project for plant enthusiasts, offering the chance to cultivate orchids in a controlled environment tailored specifically to their needs. With the integration of advanced technologies like IO controllers, smart relays, and an 8-channel relay board, building an orchidarium becomes not only feasible but also efficient and precise. These components work together to automate the essential functions needed to maintain a perfect environment for orchids.
What is a DIY Orchidarium?
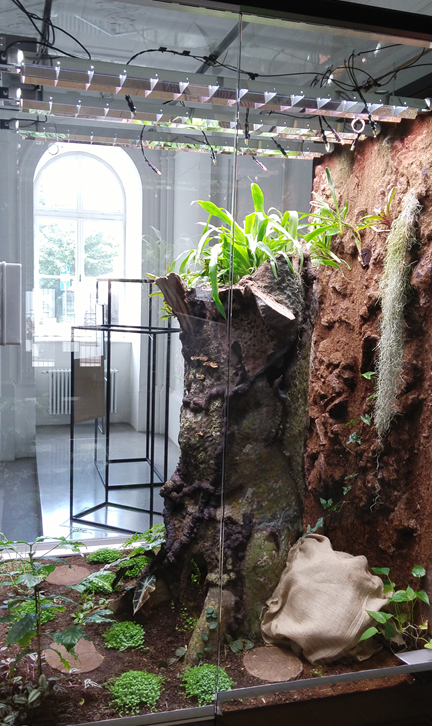
A DIY orchidarium is a custom-designed enclosure created to house orchids in conditions that are ideal for their growth. Unlike traditional houseplants, orchids require specific temperature, humidity, light, and airflow conditions to thrive. A DIY orchidarium gives you full control over these factors, enabling you to mimic their natural tropical habitat.
Building an orchidarium involves choosing the right enclosure, setting up environmental controls, and automating the system to reduce the amount of manual intervention required. With the help of automation tools like IO controllers, smart relays, and an 8-channel relay board, you can ensure that your orchidarium runs smoothly, providing your orchids with the perfect conditions to grow and flourish.
Planning and Setting Up the Orchidarium
The first step in building a DIY orchidarium is selecting the appropriate enclosure. A glass tank or acrylic enclosure is often used, as it allows for visibility and easy maintenance while providing a controlled environment. Once the enclosure is chosen, the next step is to plan the environmental systems that will regulate the temperature, humidity, light, and airflow. These systems are where automation technology plays a pivotal role.
Temperature Control: Orchids typically require a stable temperature, often between 60°F and 80°F (15°C to 27°C). To achieve this, you can install a heater and fan system, which can be automated using a smart relay to turn on and off based on readings from a temperature sensor.
Humidity Control: Orchids thrive in humid environments, often requiring humidity levels between 50% and 70%. A DIY orchidarium can be equipped with a misting or fogging system that is controlled by a smart relay. By connecting a humidity sensor to an IO controller, the system can automatically activate the misting system when the humidity level falls below a set threshold.
Lighting Control: Proper lighting is critical for orchids, as they require a specific photoperiod (the duration of light exposure) to bloom and grow properly. By using an 8-channel relay board, you can control the lights in your orchidarium, setting them to turn on at sunrise and off at sunset or adjusting them according to the orchids’ needs. The IO controller can also be used to adjust the intensity of the lights if you incorporate dimmable LED grow lights.
Airflow: Good airflow helps prevent the growth of mold and ensures that the orchids receive fresh air. Small fans can be connected to the 8-channel relay board to provide airflow when needed. The fans can be activated automatically by the IO controller based on temperature or humidity readings.

Integrating Automation Systems
The magic of a DIY orchidarium lies in the integration of IO controllers, smart relays, and an 8-channel relay board to create a seamless, automated environment. Here’s how you can integrate these components for maximum efficiency:
IO Controller: The IO controller serves as the brain of the system, gathering input from the sensors (temperature, humidity, light levels) and making decisions based on pre-programmed rules. For example, when the IO controller detects that the temperature has dropped too low, it can signal the smart relay to activate a heating system or adjust the fan speed to regulate the temperature.
Smart Relays: These relays are responsible for controlling high-power devices, such as lights, heaters, fans, and water pumps. Each relay on the 8-channel relay board can be programmed to activate specific devices in response to data from the IO controller. For example, if the humidity sensor detects a drop in moisture, the smart relay will turn on the misting system.
8-Channel Relay Board: The 8-channel relay board allows for the simultaneous control of multiple devices. With this relay board, you can connect up to eight different devices in your orchidarium, such as lights, heaters, pumps, and fans. This centralized control system makes it easier to manage and optimize the various functions of the orchidarium.
By using these components in tandem, you can build a fully automated system where the orchidarium regulates itself based on real-time environmental conditions. You won’t have to worry about manually adjusting the temperature, humidity, or lighting, as the system will handle all of that for you.
Step-by-Step Setup for Your DIY Orchidarium
Build the Enclosure: Start by selecting and assembling the enclosure. Ensure it is large enough for the orchids to grow and includes features like ventilation holes or mesh panels to allow for airflow.
Install Sensors: Place sensors for temperature, humidity, and light inside the orchidarium. These sensors will send data to the IO controller.
Wire the Relays: Connect the smart relays to the devices that will be controlled, such as lights, fans, heaters, and misting systems. These relays will receive signals from the IO controller.
Connect the IO Controller: Program the IO controller to monitor the sensors and activate the relays based on specific parameters (e.g., turn on the fan if the temperature exceeds a set point).
Test and Adjust: Once everything is set up, test the system to ensure that all devices are responding correctly to environmental changes. Adjust the settings as necessary to fine-tune the system to your specific needs.
Benefits of a DIY Orchidarium with Automation
A DIY orchidarium equipped with automation technology offers several advantages:
- Consistency: Automated control ensures that your orchids receive the same optimal conditions every day, leading to healthier and more vibrant plants.
- Convenience: With the system running automatically, you won’t have to spend time adjusting temperature, humidity, or light levels manually.
- Energy Efficiency: By using sensors and relays to manage devices only when needed, you can reduce energy consumption. For example, lights or fans will only be activated when necessary, avoiding waste.
- Precision: Automated systems can maintain precise environmental parameters, reducing the risk of over- or under-watering, overheating, or under-lighting your orchids.
Building a DIY orchidarium with automation is a rewarding project that not only enhances your gardening experience but also ensures your orchids thrive in the best possible conditions. By integrating components like IO controllers, smart relays, and an 8-channel relay board, you can create a self-sustaining ecosystem that takes care of all your orchids’ needs. Whether you’re a hobbyist or an enthusiast looking to experiment with automation, this approach provides a practical and efficient way to care for your plants while reducing manual effort. With the right setup, your orchids will flourish, and you’ll be able to enjoy the beauty of these stunning plants without the constant worry of environmental fluctuations.
Conclusion: The Future of Automated Orchid Care
Creating a DIY orchidarium with automation is more than just a fun project—it’s an opportunity to harness the power of technology to create an optimal, self-sustaining environment for your orchids. By integrating critical components like IO controllers, smart relays, and 8-channel relay boards, you can build a system that effectively monitors and manages all aspects of your orchidarium, ensuring that temperature, humidity, light, and airflow are always at the ideal levels.
These automation technologies simplify the care process, turning what might have been a time-consuming and labor-intensive task into an effortless experience. The IO controller acts as the brain of the system, processing data from sensors and issuing commands to the smart relays and 8-channel relay boards that control your devices. This integration enables precise, real-time responses to environmental changes, making the entire system not only more efficient but also more effective in maintaining the perfect conditions for your orchids to thrive.
One of the greatest advantages of such a system is the level of precision and consistency it offers. Orchids, being sensitive plants, require specific conditions to grow and bloom, and automation takes the guesswork out of their care. Whether it’s managing the lighting cycle, controlling temperature fluctuations, or maintaining the right humidity, your system will work round-the-clock to create an environment that mimics the orchids’ natural tropical habitat.
Furthermore, by integrating these smart technologies, you are not only ensuring the health and longevity of your orchids but also increasing the efficiency of your system. Through automation, you’ll reduce energy consumption, decrease the time you spend manually adjusting settings, and enjoy a healthier, more productive orchidarium.
In conclusion, building a DIY orchidarium with the help of automation tools like IO controllers, smart relays, and 8-channel relay boards transforms your orchid-growing experience. It opens up the possibilities for both novice and experienced gardeners to enjoy a high-tech solution to plant care, blending the art of orchid cultivation with the precision of modern automation. With this innovative approach, you can cultivate a thriving orchidarium that adapts to your plants’ needs, creating a beautiful, low-maintenance space that ensures your orchids always flourish.
